Midweek Meal: Hairy Biker Inspired Leftovers Tangle Pie

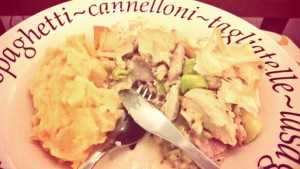
This fits in both the midweek meals and baking camps really, but definitely qualifies as a midweek meal as it took no longer than 30 minutes from fridge to plate!

I’m going to offer an ingredients list, but you could put anything you want in this pie. I used ONLY thing that I had hanging around and needed to use up. We’re quite bad at utilising leftovers at home, but with half a roast chicken left after Sunday, it would be an absolute crime to see that go to waste so I set about this ‘leftovers pie’. We’d made a chicken and ham tangle pie from the Hairy Dieters first cookbook so I used the vague memory of that as inspiration and used filo pastry instead of puff, but again this is down to choice.

tangle pie

Ingredients
Half a leftover roast chicken – bones stripped
4 rashers of streaky smoked bacon
2 leeks
A mug full of frozen petit pois
2 large spoonfuls of crème fraiche
1 chicken stock cube
Corn flour
Wholegrain mustard
1 glass white wine (plus 1 for drinking)
Ready rolled filo pastry (unless you are completely insane and want to make your own)
1 large garlic clove

And here is what I did: Preheat oven to 200 degrees. Cut the bacon into chunks and dry fry. Streaky bacon is so fatty you really don’t need any oil, it’ll be frying in its own fat in no time. When the bacon is nicely crisped, add in our already cooked chicken and toss it about in the pan with the bacon for a couple of minutes to add flavour. Remove all of this from the pan and lay in your oven proof pie dish.

Now in the bacony pan, crush one garlic clove and add chopped leeks. Add a little bit of butter and fry gently until the leeks soften. Layer over the meat in the pie dish with the addition of your frozen petit pois.

Again in your bacony, buttery, leeky pan, pour a glass of white wine and heat until it bubbles. Pour all of this into a small saucepan making sure you scrape the bottom of the pan to get any remnants for extra flavour. Using a saucepan at this stage just make it easier to get the right consistency. Once your white wine is bubbling again in the pan, add a heaped teaspoon of wholegrain mustard and a couple of ladles of chicken stock. Some fresh thyme would also work well here if you have some to hand. Now melt in your 2 large spoonful’s of crème fraiche and bring the mixture to a simmer. You’ll need to add some kind of agent here to give your sauce the lovely creamy consistency you expect from a pie so option 1 would be to make a roux using butter and flour as a thickening agent, but on this occasion I used option 2 which is a dusting of cornflour. Sprinkle this in a whisk over a low heat until you get your desired thickness. You want it to cling to the back of a spoon but you don’t want your spoon to stand up! Add a pinch of sea salt and black pepper.

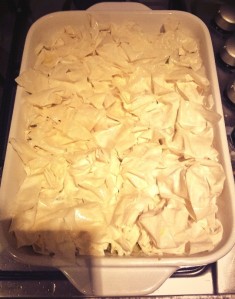
pie

Pour your sauce over the pie dish contents and cut long strips of filo pasty. Screw the strips up into rosettes and line up over the pie contents until it’s completely covered. You can give it an egg wash if you can be bothered or just brush some oil over the top. Bake for around 20 minutes or until the top is golden and crispy.

I served mine with green beans and root vegetable mash. Yum yum.

Week 7: 23rd February – Raspberry Buttermilk Sponge

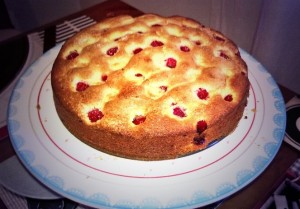
I got back to baking basics this weekend with a sure fire crowd pleaser from my baking repertoire. We were visiting my grandparents’ house on Sunday for my Nanny’s birthday so I set my alarm to get up extra early and bake them a fresh raspberry sponge. I’ve made this cake a few times before and it always turns out deliciously moist and fluffy so I thought it would be a good way to get back on the horse after a couple of bake-free weeks.

I got the recipe originally from the GBBO Everyday book but have since adapted it for raspberries and it’s sometimes difficult to find good quality British blackberries in the supermarket and raspberries have a similar effect.

nanny cake

Ingredients
150g fresh blackberries/raspberries
125g softened butter
175g caster sugar
1/2 teaspoon vanilla extract
2 medium eggs (free range of course!)
100ml buttermilk
200g self-raising flour
2 tablespoons golden caster sugar

Preheat to 180 degrees.

If you’re always ill prepared like me, you’ll almost always have a big rock of butter straight from the fridge which is less than ideal when a recipe asks from softened… but if you cut off chunks to your desired weight and place them in a little bowl, microwave for 10 seconds (absolutely not a second more!) and then give a stir, then pop in for another 10 seconds and stir again. This should give perfect ‘softened butter’ consistency without melting it down to an oil slick.

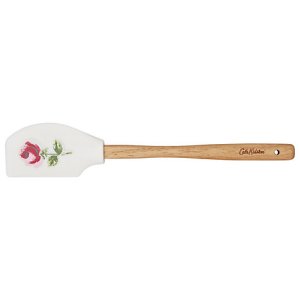
Scrape this into a big mixing bowl (preferably with a silicone spatula if you have one – if you don’t have one you should buy one! Mine is from Cath Kidston, pic below) and using an electric hand mixer, combine with the caster sugar for a couple of minutes until fluffy. If you don’t have an electric mixer do not fear, just beat using brute strength!

spat

Beat your eggs in a mugs or a bowl and add half to the mixture along with your vanilla extract. Again use your mixer to combine before adding the other half. Make sure you scrape the sides of the bowl down before each addition.

Now put away your electric mixer – you’ll be folding from here on in. Add a rough third of buttermilk and fold – the mixture my appear curdled and split but this isn’t a problem, just roll with it. Not add a third of the flour and fold in too. Continue until all the buttermilk and flour is combined with the rest of the mixture. Now you’ll notice it no longer looks curdle and split but lovely and creamy and delicious and ready to bake!

Line a 20cm tin (spring-form or loose bottomed at the very least) spoon in your mixture and spread evenly with the back of your dampened spatula. Stud with fresh raspberries or blackberries or both by pressing them down to that they just peep out of the surface. Now sprinkle on the golden caster sugar evenly.

Bake in the centre of the oven for 35 minutes and check with a skewer. If it comes out wet and coated in sticky mixture, return to the oven and continue to check at 5 minute intervals until the skewer comes out clean. Remove from oven, slide a palette knife around the edge of your sponge and release from your tin onto a wire cooling rack. DONE!

Baking Break

I haven’t baked in ages and I’m really missing it but have been poorly with the flu for a week now. Luckily I’ve been looked after and nursed back to health so I’m ready and raring to get back on the baking wagon this weekend!

Am doing dinner for 5 on Saturday so sounds like a great excuse for a cake if you ask me!

January Baking Round-Up

So far my new year’s resolutions are off to a racing start. I’ve surpassed my weekly baking goals and managed not to eat too much of it… and I’ve been going to the gym at the same time to try and counteract the extra calories from the taste testing and licking of many bowls and spoons. See below for a recap of my January bakes and makes along with recipes. Enjoy!

Toffee Fudge Cake

Flamiche
https://ladypez.wordpress.com/2014/01/02/week-1-30th-december-flamiche/
Coconut and Lime Cake
https://ladypez.wordpress.com/2014/01/02/week-1-31st-december-coconut-and-fresh-lime-cake/
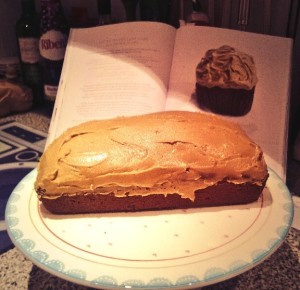
Sticky Toffee Loaf with Fudge Icing
https://ladypez.wordpress.com/2014/01/03/week-1-2nd-of-january-sticky-toffee-loaf-with-fudge-icing/
Peanut Butter Biscuits
https://ladypez.wordpress.com/2014/01/10/week-2-8th-of-january-peanut-butter-biscuits/
Apricot Crumble Muffins
https://ladypez.wordpress.com/2014/01/11/week-2-9th-of-january-apricot-crumble-muffins/
Dark Chocolate and Almond Birthday Cake
https://ladypez.wordpress.com/2014/01/13/week-2-11th-of-january-dark-chocolate-and-almond-birthday-cake/
Homemade Lemon Curd
https://ladypez.wordpress.com/2014/01/14/homemade-lemon-curd/?relatedposts_exclude=787
Traditional Madeira
https://ladypez.wordpress.com/2014/01/16/week-3-15th-of-january-traditional-madeira/
Oat and Raisin Cookies
https://ladypez.wordpress.com/2014/01/20/week-3-19th-of-january-oatmeal-raisin-cookies/
Brazil Nut Brownies
https://ladypez.wordpress.com/2014/01/29/week-4-25th-of-january-brazil-nut-brownies/

Weekend Warmer: Jerkaleekie Casserole

I adore barley. It has a yummy comforting stodginess that I always crave in these cold winter months. But it’s underrated and mostly used to simply bulk out soups. It’s not a particularly fashionable staple and I suppose it’s a kind of old fashioned poor man’s food. I remember having it in soups and stews at my grandparents’ house as child with big suety dumplings – heaven! Something people probably don’t associate with barley is how good it is for you – it can actually lower cholesterol and is a great source of fibre at the same time as giving you that glutinous pasta feeling – the perfect comfort food!

So here’s my chance to put barley on the map. I am sort of using it as a bulker in this recipe, but it’s going to steal the show on a newish twist to the ancient highland recipe of Cockaleekie soup. Instead of just using chicken stock, I’m going to change it up to a casserole with whole jerk chicken thighs. If you’re not a fan of really hot and spicy food, you could marinate your chicken in a milder spice mix or just some pepper and paprika, but for me, I love a bit of Dunn’s River jerk seasoning (careful though as it can pack a real punch!) I’d advise coating chicken thighs the night before in the seasoning so the flavours can really penetrate. I’ve suggested this as a weekend warmer as I for one wouldn’t have the time or the desire to carry out the preparation required for this as a mid-week meal but of course that’s up to you.

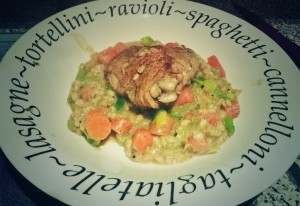
Jerkaleekie

Take your seasoned chicken thighs (skin on is best but feel free to remove skin if you’d rather. You could also use thigh fillets if you’re not keen on bones, but they add even more flavour in a dish like this) and fry in a little oil in the bottom of a casserole dish. Once the chicken is browned nicely all over (doesn’t matter if it’s not cooked through yet) add chunky chopped leeks and carrots to soften slightly. Pour over a good quality chicken stock to just about cover the chicken, add your barley and cover. Best to follow the instructions on your barley packet – you’ll probably need to have soaked it before hand for a while, or at least rinsed it, but you can buy vacuum sealed packs of barley in the way that you can buy lentils and rice, that only need to be warmed though. Since we’ve put a Caribbean twist, serve with a little dollop of creamy mashed sweet potato but you don’t really need anything to accompany it as it’s a meal in itself.

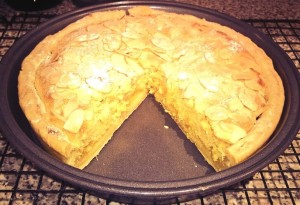
Week 5: 2nd of February – Lancaster Lemon Tart

Delia describes this tart as a ‘first cousin’ to the Bakewell, and that is exactly what it is. It’s also a perfect opportunity for me to us some more of my homemade lemon curd!

As a child, I used to go camping every year to the Peak District. We’d spend the days gambolling up and down dales and wandering about picturesque villages. One of these villages was Buxton, famous for its beautiful spring water and I’d take a little bottle to fill and drink it straight from the ground. Another was Bakewell, renowned for its tarts and a childhood favourite of mine. I remember the day so clearly that we went to the bakery that supposedly made the first ever Bakewell tart; I waited with baited breath while my mum approached with a huge slab of some brown coloured thing on a plate. It didn’t look like Mr Kipling’s… I took a big bite and… OH THE DISAPPOINTMENT! I can almost feel it now. it was nothing like what I’d been used to having at my grandparents’ house, spilling with jam and covered in sweet fondant icing. This was simply an almond sponge in a pasty case. But as I’ve grown older and wiser I’ve actually come to prefer the traditional subtler Bakewell tart, but am still to make my own.

Let this Lancaster Lemon Tart be practise for when I finally pluck up the courage to take on the real deal.

Lemon Tart

Here is Delia’s recipe: http://www.deliaonline.com/recipes/type-of-dish/desserts/tart/lancaster-lemon-tart.html
This wasn’t in ‘Delia’s Cakes’ but I decided to throw it in as an adhoc bake as I had so much curd to use up before March and I don’t often make pastry based dishes so it would present a welcome change. I did make a last minute decision to buy ready-made pastry which I know is a bit of a cop out, but making my own and the resting and chilling required is for people who have more time than me!

This is such a delicious bake – we had a sneaky slice hot from the oven and another cold after dinner!

Midweek Meal: Robbo’s Superdooper Quick (and healthy) Pasta ‘Bake’

Pasta bakes are an ultimate comfort food – they’re hot, stodgy and cheesy. What more could you ask for? But as a midweek meal they can be a hassle to compile and take a while to cook and when you don’t get home from work until 8pm that last thing you want to do is have to preheat an oven and then spend another half an hour waiting for your dinner to actually cook. By the time you’ve cooked and eaten it’s time to brush your teeth and get in bed! So this is a recipe that Rob often cooks for us when we’re both in late and in need of some cheesy pastery goodness. You’ll wonder why I’ve put the word ‘bake’ in inverted commas and that’s because the reason this recipe can be done so speedily is that it isn’t actually baked, but you get a similar result.

You’ll need:

Your favourite pasta shapes – you can use dried or fresh but probably wiser not to choose spaghetti, linguine etc
1 ball of fresh mozzarella
1 jar of your favourite store bought pasta sauce – we use Lloyd Grossman’s tomato and chilli (it’s not cheating if you’re in a hurry!)
Bag of washed fresh spinach leaves
1 long Romano pepper, chopped – you can use normal red peppers if you like but these are tastier
1 clove of garlic, crushed
Small punnet cherry tomatoes, halved or whole
Salt and pepper to taste

Get your salted water boiling and put in your pasta – for best results use a bronze penne and cook to al dente. (If you’re using fresh pasta you obviously need to be very careful not to overcook, so probably best to leave this step until after your sauce is prepared). Unlike with other pasta bakes, you do need to cook the pasta completely as this dish is super quick and it won’t be sitting in the oven to absorb more moisture.

In another pan, heat your sauce with the chopped pepper, tomatoes and garlic. You can add the cherry tomatoes whole or halved, whichever you prefer – personally I prefer them hard and then cooked just until they pop. When this has all softened slightly, gradually add in handfuls of spinach – you can use as much or as little as you like, there are no rules as long as you have a dish big enough to contain it all!

Once you pasta is cooked, drain it and start heating your grill. You’ll now need to transfer the pasta and sauce to an oven/grill proof dish like you would with a normal pasta bake. Slice your mozzarella ball and lie the pieces evenly over the surface and top with a pinch of sea salt flakes and a grinding of black pepper.

Now simply pop until the grill until the mozzarella bubbles. Done. How easy was that eh? It couldn’t have taken any more than 20 minutes front to back and now you’ve got an extra half an hour to unwind before bed you lucky sausage!

A really nice addition to this would be some crispy fried pancetta or some chorizo coins if you’re going for a slightly less diet friendly option. Sometimes when concocting pasta dishes at home we tend to use less pasta and bulk out the dish with some grated courgette for an extra healthy option. This is great reheated for lunch the next day too!

Goats Cheese and Red Pepper Savoury Muffins

I was just flicking through some pictures on my phone and suddenly remembered these tasty treats that I must make again soon! I came across this recipe in the GBBO Everyday book last year, and I couldn’t resist having a go. I’d just started my new job at Citi and thought a good way to win favour with my new colleagues by baking them something interesting but I know that not everyone has a sweet tooth to I made raspberry shortbread and these. They went down a storm and made me lots of new friends!

cooked muffins

They make a great breakfast or you could eat one for lunch with some soup, but the best things about them in that people just aren’t used to eating a savoury muffin so everyone will be taken by surprise by how tasty they are. One guy from India who I work with had never eaten basil before and fell instantly in love with it.

Here’s the recipe I used:
Ingredients:
100g goats’ cheese
1 medium red pepper cut into chunks
300g plain flour
2 teaspoons baking powder
1/2 teaspoon bicarbonate of soda
Salt and pepper
Big handful of fresh basil chopped
225ml buttermilk
1 medium egg
100ml extra virgin olive oil

Preheat the oven to 190°C and line a 12-hole muffin tray with cases. Crumble goats’ cheese into pieces, tear or chop your basil (not too small) and cut your pepper into chunks. I like the chunks nice and big. Sift the flour, baking powder and bicarbonate of soda into a mixing bowl then add the red pepper, basil and cheese and mix together.

Beat the egg, buttermilk and olive oil together in a mug or a bowl with a generous pinch of salt and a splash of cayenne pepper. Pour into your dry ingredients and mix everything to combine until you have a nice rough and chunky mixture but with no dry clusters of flour. Spoon equally into muffin cases. You’ll end up with a really lumpy mixture and don’t be put off by its chunky appearance in your muffin cases as you want these to have a really rustic look and feel.

Bake for 25-30 minutes in the centre of your preheated oven. Leave them to cool for a few minutes and then you can eat warm if you can’t wait!

My notes: a sprinkling of cayenne pepper is optional (I added to the recipe to give a little aftershock). I’d also advise to be generous with your salt as this will bring out the flavour of the goats cheese. Don’t scrimp on the basil either – this adds a lovely streak of colour beside the red peppers and of course a beautiful flavour.

prebaked muffins

Et voila, why not try these and wow your colleagues at the next charity bake sale.

Week 4: 25th of January – Brazil Nut Brownies

Now presentation-wise, these brownies did not impress when I took them from the oven. But taste-wise… WOW. These are by far the tastiest brownies I’ve ever made (although I may have over banked very slightly as they did break a bit but that could also have had something to do with using too generous a helping of brazil nuts!)

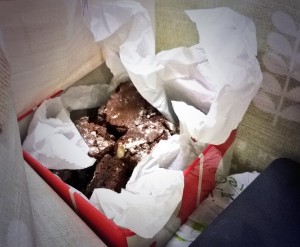
I run a monthly book club in Blackheath and I like to sometimes bring along something I’ve baked for the gang. I’m giving them my brownies tonight; I hope they like them! Here they are hidden in my bag where nobody at work can eat them…

hidden brownies

They were a hit! Book clubbers loved them, and I had one left over to take home for Rob! Two people asked for the recipe and they were described as ‘melt in the mouth’ (someone who shall not be named ate four!).

Here’s the recipe: http://www.deliaonline.com/recipes/cuisine/exotic/american/brazil-nut-brownies.html
My recommendation would be to cut the brazil nut pieces really small. I cut my brazils into thirds as I wanted big chunks but this is what made the mixture difficult to hold together.

Brownies are such an easy treat to assemble but the tricky part is the bake. One minute too long and you over bake, one minute too little and you end up eating them with a spoon, but either way the taste is great so enjoy the trial and error!

My First Coffee

I’m an adventurous foodie – I’ve dabbled in all sorts of exotic meats such a zebra, kangaroo and crocodile. Last year I wrote a log about my first experience of eating snails! I always live by the rule ‘don’t knock it til you try it’ and the only place a draw the line is smoking (eurgh).

Now as ridiculous as it sounds, it’s taken me almost 28 years, but yesterday I had my first ever taste of coffee. I’ve always steered well clear as the smell makes me throw up. Don’t get me wrong, the smell of freshly ground beans is a phenomenal aroma and although I don’t hate it, I don’t love it either. But the smell of a cup of coffee has been known to make me vomit or pass out, especially in a confined space like on the tube or a train.

Last night I got off the tube a stop early on my way home in order to have a nice brisk walk in the crispy cold January night air. My route took me past a tesco metro so I popped in to grab some dinner, and as I walked down the refrigerator aisle I suddenly became overwhelmed with the desire to drink a chocolate milkshake. Chocolate milkshakes in whatever form they take are not particularly diet friendly, so I stood and pondered infront of them for a while until I came to me senses and told myself I DID NOT deserve a milkshake of any sort. Then in my peripheral vision I spotted a chilled, Starbucks ‘Seattle Latte’ for only £1. Without thinking any further, I popped it into my basket, purchase it, stepped out through the electric double doors, popped in a straw and sipped.

seattle latte

I had just had my first ever taste of coffee.

I managed to drink half of it before getting home and I can honestly say, I thought it was actually quite nice! Whether this had anything to do with the fact that it was sealed shut so I couldn’t smell it may have been a factor but nevertheless, I had just drunk my first coffee! I don’t think I’m going to become a coffee drinker now. If I’ve managed without it for 28 years I think I’ll be ok to continue as such.

The moral of this story is never say never, you only live once, and it’s never too late to try something new!